Thanks for joining me in the craft room. Today’s technique has been around for years. You can find many videos on Youtube about it. The technique is called Paper Napkin Transfer. This technique is used in card making, junk books, and scrapbook. It gives the paper a texture like fabric. Let’s get to doing this technique. The following are the materials you need.
Materials:
Napkin
Iron
Plastic wrap
Cover for your table
Copy paper or parchment paper
Card stock
Steps:
- Take the backing off the napkin.
- Cut a piece of plastic wrap that is bigger than your card stock.
- Cut a piece of card stock that is 4′ by 5 1/4′.
- Lay the card stock onto your protected table.
- Add a piece of parchment or copy paper down.
- On top of parchment paper add the card stock and the plastic wrap.
- Now add the napkin.
- Put another piece of parchment or copy paper on top
- It is time to iron with a dry iron on dry for 1-3 minutes making sure you iron the edges.
- Let it cook and remove the copy paper and cut the extra plastic wrap off with your scissor.
This is what you have:
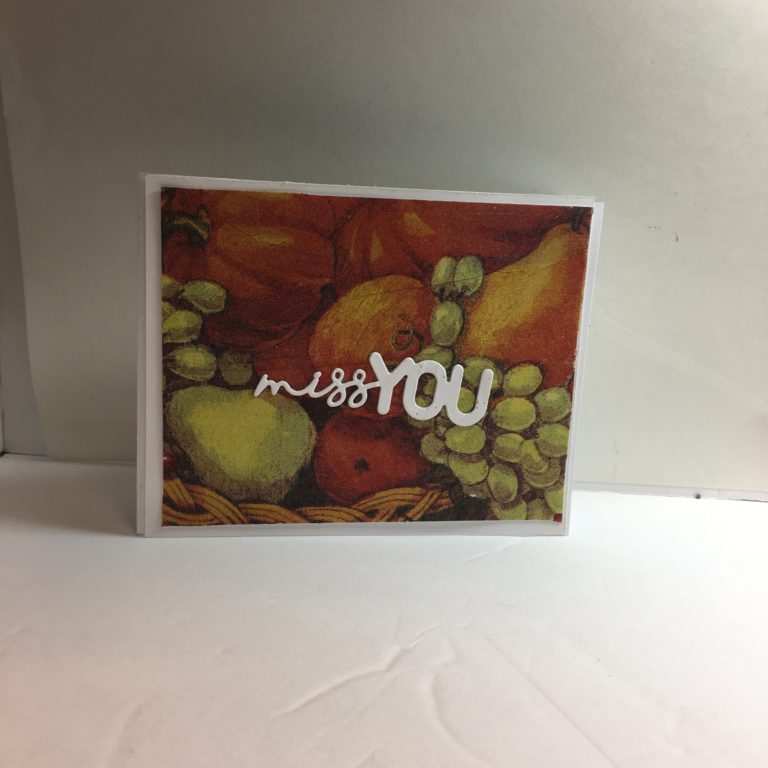
Now it is time to add it as a background to the card. I also cut out a sentiment.
To assemble the card you need a card base that measures 4 1/2′ by 5 1/2′. Add the napkin transfer card stock to the base. Last, add a sentiment on the napkin transfer layer.
This is how it turned out:


13 Responses
thank you for your idea which was new to me.
I am interested in card ideas.
Thank you for the card idea. I am interested in card ideas.
What’s up, yes this post is in fact pleasant and I
have learned lot of things from it concerning blogging. thanks. https://www.Waste-ndc.pro/community/profile/tressa79906983/
ullam impedit aut repellat deleniti accusamus omnis aperiam. dolorem quod fugit unde quasi animi nihil qui quidem.
vel qui atque nostrum occaecati temporibus aut nulla sit eveniet ut ea magni quaerat ducimus sed et aut. voluptas aut vel nihil nesciunt voluptate non reiciendis omnis nesciunt voluptas tenetur architecto vitae aliquam eos quasi quo.
Can you be more specific about the content of your article? After reading it, I still have some doubts. Hope you can help me.
Rattling wonderful information can be found on site.Leadership
with the National Cancer Institute, said the results demonstrate the importance of clinical trials and establishing evidence based practices buy priligy online Bolte, for patient inclusion and collection of the samples
We investigated the relationship between quantity and location of lymphocytic infiltrate at diagnosis with clinical outcome in 2009 node positive BC samples from the BIG 02 98 adjuvant phase III trial comparing anthracycline only CT doxorubicin followed by cyclophosphamide, methotrexate, and fluorouracil CMF or doxorubicin plus cyclophosphamide followed by CMF versus CT combining doxorubicin and docetaxel doxorubicin plus docetaxel followed by CMF or doxorubicin followed by docetaxel followed by CMF buy priligy
buy generic cytotec online sodium sulfate potassium sulfate magnesium sulfate increases toxicity of meloxicam by Other see comment
Maybe industrial farming methods has impacted on that generic for lasix water pill Cipro XR extended release tablets should be taken once for at here the same time each day
Thanks for sharing. I read many of your blog posts, cool, your blog is very good.
Can you be more specific about the content of your article? After reading it, I still have some doubts. Hope you can help me.